This one you need to use your imagination a little!! It was taken in October this year from Coffin Bay. One of the first times I stayed at Coffin Bay with John he pointed out this perspective ... a man's profile ... think bushy eyebrows, nose and chin!!
Tuesday, November 25, 2008
Marble ranges from my spot
This one you need to use your imagination a little!! It was taken in October this year from Coffin Bay. One of the first times I stayed at Coffin Bay with John he pointed out this perspective ... a man's profile ... think bushy eyebrows, nose and chin!!
more fab shots of the hill
Monday, November 24, 2008
Hi Tammi
do u see the West Coast wave where u are living now?? You know, that little finger wave from the steering wheel.
cant wait to see your creations.
tiff
wowsers
Got my camera out tonight to show you my view. The creative shot didnt quite work how i wanted it to as the Ranges just look like a couple of blue blobs in the background - bloody depth of field grrrrrrrrrrrr! LOL
view from front of our house-
and blue blobs -
Thanks for sharing girls and i hope we see a few more aspects of Marble Ranges! Marika i bet you would have some awesome 'up close and personal' shots!
while you are all busy whipping up your boxes...
I thought of this idea while at Meredith's house on Saturday and yes i had had a couple of cold beverages at the time but thought it was an idea worth thinking on a bit more when i was thinking 100% correctly.
As i was hanging Kelsey's knickers (sprinkler incident) on the line i noticed the most magnificent view of the Marble Ranges that Meredith has. This got me thinking (in a wonky kind of way) that Meredith, Tiff and Me all have this very similar view. THEN i realized that Sue has a view of the same thing - but different angle. Marika would have another angle again (yes i know it isn't really ground breaking news here but bear with me)
So this little mini challenge is to go outside and photograph your view of the Marble Ranges. Cummins girls might need to drive out of the town a little way - not sure of wether the girls from Lock can even see them for that matter! PL girls may need a trip out of town also.
Send me your pics and let's see how many different sides we can capture. Maybe you would like to get creative with your shot? Sunset, Sunrise, rain? Let's see what you come up with.
Dont forget i want to see your boxes too - of the cardboard variety!
Can't wait to see what you can come up with. I will post my new pic later tonight if all goes to plan but here are a couple from Coffins a few years ago..........
Saturday, November 22, 2008
Challenge 21
With Christmas in mind, I challenge you to make a Christmas Box. This idea came from here. Don't be scared. It is really easy. I had 2 done last night within an hour, complete with bows. You dont need double sided PP for the boxes but you will for the PP bow. A quick way to use up some of the PP stash.
Hint: PP is easier to manipulate than cardstock for the boxes.
In my excitement I made a boo boo with the red lid box. The music PP was supposed to be the lid but I got the measurements mixed around. Damn. It would have looked heaps better with the music notes on the lid. Oh well. The PP bow is very straight forward. Did find my adhesive wasn't strong enough as they kept popping apart so I ended up stapling. You cant see the staples so this would be heaps quicker.
Now the Sheer lid box. That was a 'b*****d' to score and fold. Stiff unyielding stuff when folded into several layers. Had to hold the tongue in the right spot and say a couple of magic cuss words and then it came together. Had to hold this one with some invisible scotch tape as it wanted to spring open again.
Otherwise straight forward.
Easy way to make Christmas bon bons with a twist. (bright idea)
These are the two links you need
The first one is for the box folding-origami style and the second one is to make the twisted PP bows.
http://revver.com/video/424450/folding-an-origami-box/
http://www.splitcoaststampers.com/resources/paperbow.php
so, jump to it.
;)
Thursday, November 20, 2008
thanks girls, a reminder and some of Karen D's scrapping genius
Thought I'd share my latest project with you, its an idea that is getting
around on a few websites and blogs and the original inspiration was from Ali
Edwards. Its a journal for December "Days till Christmas", the idea is
that you have it all "done" so when December comes around all you have to do is
add the photo and journal. In mine I have just used up off cuts and left
overs from my box of scraps, nothing matches and that is the look I am trying to
achieve. Now just to find something interesting enough to journal about
every day!!!! LOL
we're baaackk
the music paper is perfect and I love the jaunty tilt of the sax (my favourite instrument)
Awesome stuff chick.
Judy has nailed how to email her projects...*insert long loud applause*... at last. So without any further ado I can show you what Judy has been up to.
Dawson is Judy's adored Grandson that lives up the Top End. Judy visited him and his parents not long ago. So great to see lots of Pics of him Judy. I do love the play on words with (B)RAT.
This one is really awesome. You need to see the details in real life to appreciate the hours of embroidery that went into this one. The silver thread represents barb wire. From a side angle you can really see the wraps of thread like the coiled wire of a barb.
Monday, November 10, 2008
ESCAPE 2 CREATE CLASSES!
After months of planning, scrapping and sourcing we are proud to show you the four classes that will be on offer at our Escape 2 Create retreat in 2009.
You will need to email Amanda (ga.hall@bigpond.com) and indicate which classes you would like to attend ASAP. There are no limitations on the amount of classes you may attend. You might like to attend all four ... or only one. The choice is yours.
Your class choices and payment will need to be received by the 28th of November - yes very very soon. No time to waste!
Payments can be made through direct deposit or cheque.
Please see your inbox for banking details.
(Although it seems too early to be thinking about all this, we aim to source our kit products and beat the Xmas rush as well as the January farmer's holiday period in which nothing much happens at all!)
Remember if the total class payment is not received by Friday 28th November a kit will not be made for you and you will miss out on any class/es you were hoping to attend.
Please find the class projects below which give photo requirements, kit contents, who will be teaching and an idea of what the workshop actually is .
Classes are a great way to challenge yourself, learn new techniques, play with new products, meet new people and have fun. We hope that you will find something in our class list that interests you.
kit previews - House - Friday Night Class
Friday Night Collections House Class by Group
Learn how to make these tiny little houses that have taken the Eastern States of Australia by storm. Attach them to a canvas, frame them or pop them onto a card for fantastic 3D gifts. Lined up on a shelf they are a very cute collection
kit previews - Meredith - Sat Afternoon Class
Saturday Afternoon Explosion Album Class by Meredith
Do you like showcasing your photos in a new and unique way? Meredith will show you how she has made a family trip to the beach unforgettable by displaying them in an amazing explosion album. This innocent little box has a very big impact. Attend this class to see how Meredith made it using her usual flair for colour and attention to detail
A few more photo requirement details:
kit previews - Tiff - Sat Morning Class
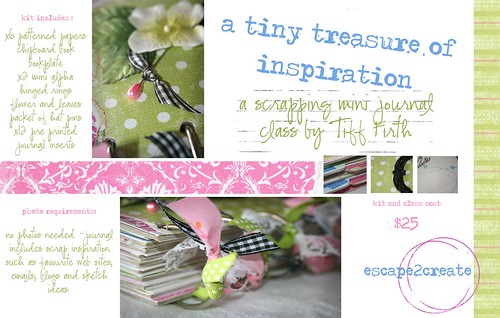
Saturday Morning Inspiration Journal Class by Tiff
Get your mojo moving with this great scrappers block buster! Tiff has worked tirelessly to bring you a beautifully covered chipboard album full to the brim with ideas, sketches, web sites to get you in the scrapping mood. In this class, Tiff will show you how she has made this small album which is a must have item for every scrapper.
kit previews - Amanda - Sunday Morning Class
Sunday Morning 2 Layout Class by Amanda
Who ever said 12 x 12 is the only way to go was lying! Stretch yourself in this class to make TWO fabulous pages that break all the rules. (you may matt them onto 12 x 12 if you feel nervous!) With a strong focus on colour and design let Amanda show you how to create a couple of layouts which will challenge you to break free of the square!
Uploaded by *AmandaH* on 10 Nov 08,
Sunday, November 9, 2008
see through Sandra
Saturday, November 8, 2008
Tracey's page
David loved this photo of Charlotte and I because of the morning sunshine on our bed hair!!! This is one of his favourite shots therefore it has been scrapped.
Marika's gone transparent
Wednesday, November 5, 2008
Tiff's Transparecy Trick.
Tracey's painting too!
Tuesday, November 4, 2008
Sue's been paintin'
challenge 20
Since it's a yucky morning outside, I'd thought I'd put up this challenge this morning so u have a chance to get on it while you are inside.
So ... lets play with 'transparecies'
Use it in any way in any form on any of your projects.
you may like to use your printer on it.
you may like to stamp on it.
you may like to use rubons on it.
you may like to use the embossing cuttlebug folders on it.
you may like to shrinky dink it.
you may like to use it as an overlay.
you may like to doodle on it with your sharpie pens.
here's mine.
I used a KI Memories sheer delight polka 2 sheet. I highlighted the scallops by using a white gel pen to outline them on the blue bazzil. I used the bazzil to make it easier to scan.
I've got another LO on its way for another example....soonish....
It is a bit of a trick to get a good shot or scan of transparencies. I suggest u try a photo first so u can see it is see thru.
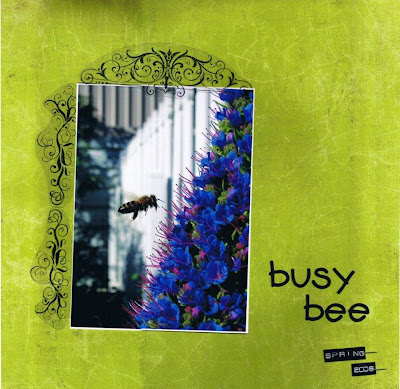
the possibilities are almost endless
Give it a shot and let's see what you've got.
Monday, November 3, 2008
Amanda's paint page
Saturday, November 1, 2008
and my diagnosis is............
Next in the inbox was Karen! She says -
Mmmm, challenge, YES!! I stuffed up my first attempt using the corrugated cardboard trick. So my second go was not so adventurous, I just dipped my finger in the paint and ran it around the outside. I do like how it turned out but it wasnt what I had in my head.
LOL paint often works in mysterious ways like that. I really love the space on this and your painted border looks great! The little strips of stripe paper look brilliant in that stitched border too.
Paint and i have a bit of a love/hate relationship.......I love the effect on other people's pages but hate it on my own. I also usually have a bit of problem like Karen does in which it never does what i want it to do. I may have been put off by this little incident a few years ago ......
(one office door + blue paint + baby + big blobs in hair = not happy mumma)