Saturday, November 22, 2008

Challenge 21

Rito. I feel a challenge coming on.

With Christmas in mind, I challenge you to make a Christmas Box. This idea came from here. Don't be scared. It is really easy. I had 2 done last night within an hour, complete with bows. You dont need double sided PP for the boxes but you will for the PP bow. A quick way to use up some of the PP stash.
Hint: PP is easier to manipulate than cardstock for the boxes.


In my excitement I made a boo boo with the red lid box. The music PP was supposed to be the lid but I got the measurements mixed around. Damn. It would have looked heaps better with the music notes on the lid. Oh well. The PP bow is very straight forward. Did find my adhesive wasn't strong enough as they kept popping apart so I ended up stapling. You cant see the staples so this would be heaps quicker.


Now the Sheer lid box. That was a 'b*****d' to score and fold. Stiff unyielding stuff when folded into several layers. Had to hold the tongue in the right spot and say a couple of magic cuss words and then it came together. Had to hold this one with some invisible scotch tape as it wanted to spring open again.

Otherwise straight forward.
Easy way to make Christmas bon bons with a twist. (bright idea)


These are the two links you need
The first one is for the box folding-origami style and the second one is to make the twisted PP bows.
http://revver.com/video/424450/folding-an-origami-box/
http://www.splitcoaststampers.com/resources/paperbow.php

so, jump to it.
;)

Thursday, November 20, 2008

thanks girls, a reminder and some of Karen D's scrapping genius

thanks girls for being so patient with the blog and lack of posts while we tried to plug the retreat classes. Hopefully some of our devoted groupies come back soon!! We hope you understand that we wanted to give the classes as much exposure as possible during the registration period.


In saying that we have been OVERWHELMED by the response!! Wow to think that we had only 15 allowed in our classes last year - and a max. of two classes per person so they could be shared fairly..........well our expectations have been waaaaaaaaaaaaaaaaaaaaaaaaaaaaay exceeded this year. Luckily we have no rules this year ;-)

Just a gentle reminder for those that haven't registerd (there are about 11) that time is running out. Next friday is the cut off to register and pay. No registration or payment recieved = no class.


While we understand some peoples reluctance to take a class - and we are definately not pressuring anyone - they are a great fun way to extend your skills, produce a beautiful piece of work without thinking too much and re-vitalize your scrapping.


I know i felt a bit ho-hum about attending classes when Meredith and I went to the Melbourne retreat but it was fantasticly inspiring and made us all go 'WOW- we had never thought about doing that!'


Anyway i hope i hear from some of you soon. (ga.hall@bigpond.com) to register. Please find class details down the page a little (scroll down) or look to the links on the right of this post.


Earlier in the week i had a lovely surprise in my inbox. The incredibly talented Karen had dropped me a little letter which contained an amazing piece of scrap-work.

she said -

Thought I'd share my latest project with you, its an idea that is getting
around on a few websites and blogs and the original inspiration was from Ali
Edwards. Its a journal for December "Days till Christmas", the idea is
that you have it all "done" so when December comes around all you have to do is
add the photo and journal. In mine I have just used up off cuts and left
overs from my box of scraps, nothing matches and that is the look I am trying to
achieve. Now just to find something interesting enough to journal about
every day!!!! LOL


This is stunning Karen! Thankyou so much for sharing it. What a brilliant way to document those exciting days leading up to Christmas!

we're baaackk

Time to move on from advertising the Retreat Classes. If u want to have a squizzie just scroll down the page and you'll find them. OR click on the links on the right hand side of screen.

Tegan has taken on the transparency challenge. YAY for you chick. Glad to see some action from that challenge.

this is a shaker box card Tegan crafted for her Music Teacher. Just how cool a gift is that.

the music paper is perfect and I love the jaunty tilt of the sax (my favourite instrument)

Awesome stuff chick.

Judy has nailed how to email her projects...*insert long loud applause*... at last. So without any further ado I can show you what Judy has been up to.


Dawson is Judy's adored Grandson that lives up the Top End. Judy visited him and his parents not long ago. So great to see lots of Pics of him Judy. I do love the play on words with (B)RAT.
This one is really awesome. You need to see the details in real life to appreciate the hours of embroidery that went into this one. The silver thread represents barb wire. From a side angle you can really see the wraps of thread like the coiled wire of a barb.
I do love this one...

Monday, November 10, 2008

ESCAPE 2 CREATE CLASSES!

Dear scrapper:

After months of planning, scrapping and sourcing we are proud to show you the four classes that will be on offer at our Escape 2 Create retreat in 2009.

You will need to email Amanda (ga.hall@bigpond.com) and indicate which classes you would like to attend ASAP. There are no limitations on the amount of classes you may attend. You might like to attend all four ... or only one. The choice is yours.

Your class choices and payment will need to be received by the 28th of November - yes very very soon. No time to waste!

Payments can be made through direct deposit or cheque.

Please see your inbox for banking details.

(Although it seems too early to be thinking about all this, we aim to source our kit products and beat the Xmas rush as well as the January farmer's holiday period in which nothing much happens at all!)

Remember if the total class payment is not received by Friday 28th November a kit will not be made for you and you will miss out on any class/es you were hoping to attend.

Please find the class projects below which give photo requirements, kit contents, who will be teaching and an idea of what the workshop actually is .

Classes are a great way to challenge yourself, learn new techniques, play with new products, meet new people and have fun. We hope that you will find something in our class list that interests you.

kit previews - House - Friday Night Class

Friday Night Collections House Class by Group

Learn how to make these tiny little houses that have taken the Eastern States of Australia by storm. Attach them to a canvas, frame them or pop them onto a card for fantastic 3D gifts. Lined up on a shelf they are a very cute collection

kit previews - Meredith - Sat Afternoon Class


Saturday Afternoon Explosion Album Class by Meredith
Do you like showcasing your photos in a new and unique way? Meredith will show you how she has made a family trip to the beach unforgettable by displaying them in an amazing explosion album. This innocent little box has a very big impact. Attend this class to see how Meredith made it using her usual flair for colour and attention to detail


A few more photo requirement details:

kit previews - Tiff - Sat Morning Class

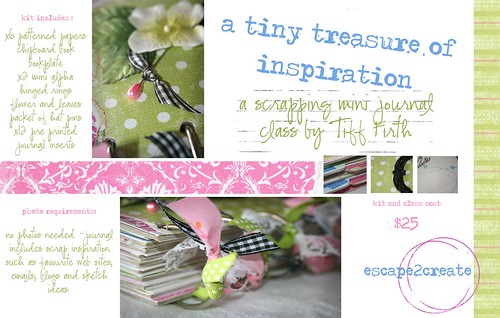
Saturday Morning Inspiration Journal Class by Tiff
Get your mojo moving with this great scrappers block buster! Tiff has worked tirelessly to bring you a beautifully covered chipboard album full to the brim with ideas, sketches, web sites to get you in the scrapping mood. In this class, Tiff will show you how she has made this small album which is a must have item for every scrapper.

kit previews - Amanda - Sunday Morning Class

Sunday Morning 2 Layout Class by Amanda
Who ever said 12 x 12 is the only way to go was lying! Stretch yourself in this class to make TWO fabulous pages that break all the rules. (you may matt them onto 12 x 12 if you feel nervous!) With a strong focus on colour and design let Amanda show you how to create a couple of layouts which will challenge you to break free of the square!

Uploaded by *AmandaH* on 10 Nov 08,

Sunday, November 9, 2008

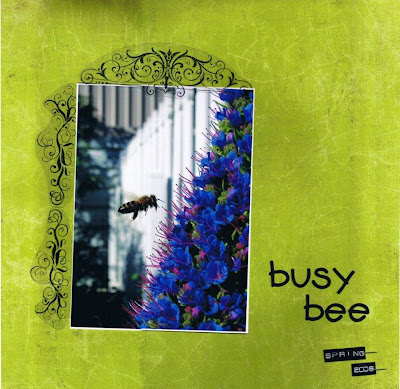
see through Sandra


oh wow Sandra - this is great!


Love love love that action shot of the bee - what an industrious little fellow he is!


Your photo just pops right off that page and the transparent flourishes finish it all off perfectly.


Gorgeous work.


For those lurking around waiting for the retreat classes to be shown - stay tuned!


Soon, very very soon they will be shown and bookings will be taken.

Saturday, November 8, 2008

Tracey's page


Tracey has submitted this one for the transparent challenge. She has used a peice of transparency tucked in behind the photo but has almost done a bit of an abstract take on the theme with the photo.
She says -
David loved this photo of Charlotte and I because of the morning sunshine on our bed hair!!! This is one of his favourite shots therefore it has been scrapped.
The morning sun on your hair certainly does give it a transparent feel. Great page Tracey and thanks for joining in.
(mine is still coming = i have been sick and a bit flat but will get onto it)

Marika's gone transparent


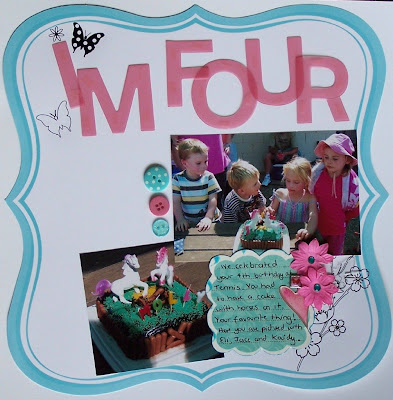
It is great to see some girls becoming more regular in here - Marika and her fabulous creations are making an appearance almost weekly now and it is great to see. I love how she interprets the challenges.
That Jenni Bowlin die cut paper looks awesome teamed up with the transparent ghost alphabet and the little butterfuly rub-ons. Lovely work Marika - glad you joined in this challenge even though you didn't feel you had quite the right stuff in your stash. Ghost letters are totally acceptable and as you have shown - a clever example of the TRANSPARENT theme.

Wednesday, November 5, 2008

Tiff's Transparecy Trick.

Hiya Ladies.
this is the other LO that was coming soonish.

I got the idea from Annie's kite packaging.

I happened to have embossed some transparencies last week thru the Cuttlebug and thought them perfect for this LO idea.

I have photographed this one as the Gypsophlia wouldnt have scanned very well as it stands out a fair bit from the page.

so here tis...

Tracey's painting too!


wow the last challege got everyone to pull the ol' paints out of the cupboard (or buy some new tubes ;-) ) and get their brushes wet!
Tracey is no exception and has gone all out - with some fantastic painted waves, a border and also a slight edge on her ghost letters.
FANTASTIC
Great to see you covered your bases for this next 'transparency' challenge too Trace ;-) with your ghost letters bringing it home for you!
How damn cute are the photos and the 'guts' title cracks me up!

Tuesday, November 4, 2008

Sue's been paintin'

It's done, it's done!!! My page for Meredith's paint challenge.


Guess what, I have kraftist too.......and i opened my new tube of orange paint that i bought today. My background is by painting over some mesh i have had in my stash for years....... it has blurred in together a bit, but never mind.


AND i have used a sheer journalling tag....does that qualify for your challenge too Tiff??.


I am also loving black stitching at the moment.


Sorry, it's not a cropped photo, hope you can see it okay..... My journalling reads " When this boy smiles your heart just melts. Evan, you are so happy!"

challenge 20

Good morning scrappers.

Since it's a yucky morning outside, I'd thought I'd put up this challenge this morning so u have a chance to get on it while you are inside.


So ... lets play with 'transparecies'


Use it in any way in any form on any of your projects.


you may like to use your printer on it.

you may like to stamp on it.

you may like to use rubons on it.

you may like to use the embossing cuttlebug folders on it.

you may like to shrinky dink it.

you may like to use it as an overlay.

you may like to doodle on it with your sharpie pens.


here's mine.

I used a KI Memories sheer delight polka 2 sheet. I highlighted the scallops by using a white gel pen to outline them on the blue bazzil. I used the bazzil to make it easier to scan.

I've got another LO on its way for another example....soonish....

It is a bit of a trick to get a good shot or scan of transparencies. I suggest u try a photo first so u can see it is see thru.


the possibilities are almost endless

Give it a shot and let's see what you've got.

Monday, November 3, 2008

Amanda's paint page


YAY - challenge done :)
Spots (since we are all mad for them) made from using a punch as a template and then dry brushing the paint over it. Pink numerals stamped in paint also (top right)
Will add that i do love that paper by Pink Paislee which you can see here and used that as inspiration.

Saturday, November 1, 2008

and my diagnosis is............

a case of contagious Kraft-itis!

I think the source of infection is from a Ms. Meredith........this kraft bizzo is certainly catching!

Easy to see why when it looks so damn good!

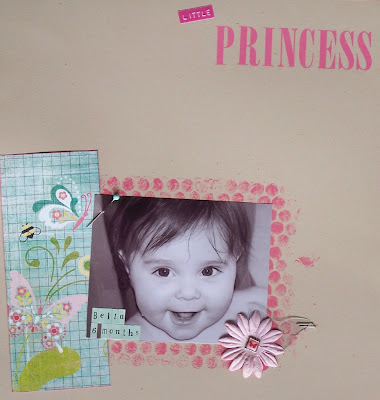
First up another from Marika who has obviously found her artist within! She says she loves the new BG range and has tried the ol' bubble wrap and paint trick (i agree this looks brilliant together) I also think that pink against the kraft is so eyecatching! Fantastic work Marika. I am thinking that you are liking this paint challenge!

Next in the inbox was Karen! She says -


Mmmm, challenge, YES!! I stuffed up my first attempt using the corrugated cardboard trick. So my second go was not so adventurous, I just dipped my finger in the paint and ran it around the outside. I do like how it turned out but it wasnt what I had in my head.


LOL paint often works in mysterious ways like that. I really love the space on this and your painted border looks great! The little strips of stripe paper look brilliant in that stitched border too.

Paint and i have a bit of a love/hate relationship.......I love the effect on other people's pages but hate it on my own. I also usually have a bit of problem like Karen does in which it never does what i want it to do. I may have been put off by this little incident a few years ago ......


(one office door + blue paint + baby + big blobs in hair = not happy mumma)

Friday, October 31, 2008

two painters on board


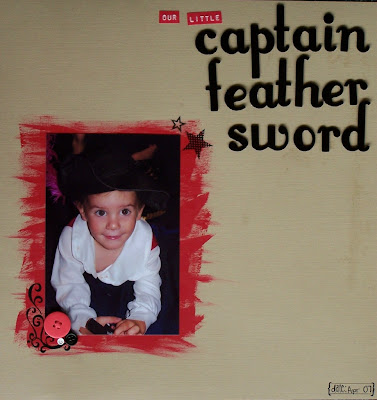
Well done Marika! I love your less is more philosophy of late. That paint against the kraft is so striking! And how appropriate having the red for captain feathersword! The jaggedy edge of teh paint is brilliant! She says she is taking inspiration from Meredith with her use of Kraft cardstock! I know from experience that using kraft can be addictive - it looks so good with anything!

Am really enjoying seeing you bloom!


(I hope you got the message about the class being postponed and are not still waiting for a pickup in Cummins!)
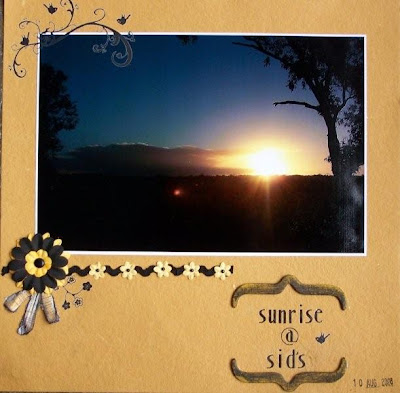
And Sandra - artist extrodinaire! Wow at this sunrise. She says she painted the brackets in yellow and then black and afterwards sanded the black back so as the yellow showed through. Great work and another who is blooming! That flourish in the top corner is perfect!
Well actually i think we all are! This blog is inspiring us to try new things all the time! Keep up the great work!

Janice is going digi.

Here is one chickie who is almost converted to a dixie (whoopsie, sorry, typo) digi chick. And she is LOVING it.
Janice has been showing me a trick or two.

check this out.


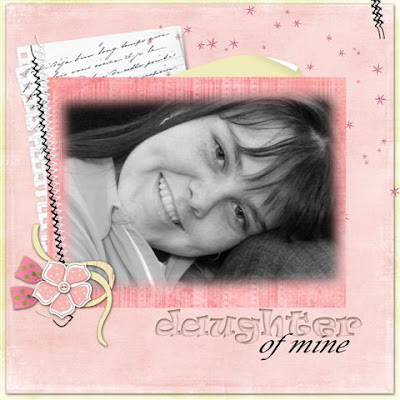
The feathering effect softens the awesome pic so beautifully. And what a great pic of Sarah. She must be so proud of this one and of you.

Love the stitching and the folded corner of the paper.

She says Really enjoying the digi scrapbooking classes with Karen Jennings.This is a layout that Ive done at home doing some of the things I have learnt. I was really happy with the way this turned out.

Well done Janice. Keep em rollin' in.

painted


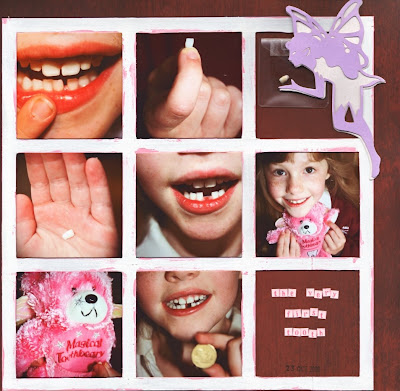
Did this little number the other night up at Lock scrap a thon. You girls should really go to the next one. It was such a blast.

I cut the grid out of a Nutrigrain cereal box, painted it white and then smeared on pink paint with my finger along all the edges to give it some interest.

The actual tooth is by the fairy's outstretched hand.

As far as Annie knows, I had to ask the tooth fairy with a lot of pretty pleases if I could keep Annie's first tooth so I could scrap it. Lucky for me. the fairy said yes.

;D

Thursday, October 30, 2008

Maryanne!


Sorry for the delay in getting this one up chook - i have been at work this afternoon so please forgive me!
Hell this girl is just a scrapping machine lately. I think we might have created a monster ;-)
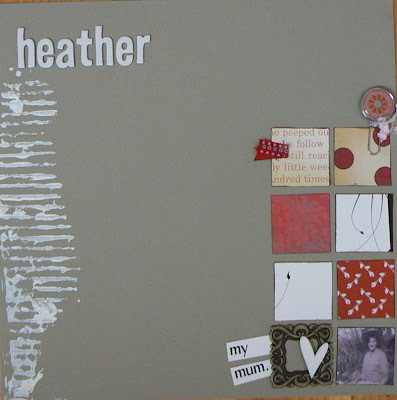
I love love love your painted effect down the side - fantastic.
she says -
heres my page for merediths paint challenge.used cardboard,,but peeled off the
paper layer so the corrugated bit was exposed,and loaded with paint, not toooo
messy
.
I am loving this effect - on yours and Meredith's page. Watchout cardboard...cause i am gonna try this one!
Love your colour blocking too Maryanne. Those little squares look so sweet and the random embellishments are perfect. How adorable is that little photo of your Mum?!!
Great work!

Last Chance


Heya girls.


Just wanted to let people know one last time about my class at the Shabby Chic Shack TOMORROW NIGHT.


This is the last chance to book in as unless we get some more numbers the class will be cancelled.


Understandably it is a tricky time of the year but it is really disappointing non the less.


If the drive is the problem i have two spare seats - leaving Cummins at 5pm.


It would be great to have a couple more bookings and make this a go-er after all.

Wednesday, October 29, 2008

Challenge 19

Right I'm back with the challenge ... finally.

So this week the challenge is to use paint on your layout ... not ink.
Go on and get your hands dirty!! Or wear a pair of disposable gloves - less messy!

I think that digi layouts would still be possible using a paint effect.

So here is my basic example ...

This layout was inspired by a digi layout by Mary Rogers, featured in Scrapbook Trends magazine September 2008.

I used a piece of corrugated cardboard for the stripes and just a foam paint brush for the top left hand corner.

You have seen Amanda use a glass for circles before and a flick of the wrist for paint splatters - a little hint ... dilute the paint slightly with water to get good splatters and cirlces.

Another technique is to run the paint brush around the outside edge of the whole page.

Go on give it a try and show us your techniques. Include a little explanation of your technique if you think it might help the rest of us to try something new.

Tuesday, October 28, 2008

hands up please

*bumped*

rito

roll call

who has subbed their heritage LO to SBM sub call??!!

I would love to see your work in print.


I know of one chickie who subbed and has been accepted. TWICE. I'll let her 'out' herself on here when she is ready. ;D

**edited by Tiff to add**
Congrats to Maryanne. She has given me the ok to toot her name out loud.
so
TOOT TOOT.
WAHU to U


Next challenge ...

Hi again!

The next challenge is on its way soon ... just have to finish off the example!!

Melbourne Cup day

Hi all,

Just a little plug here ...

The Shabby Chic Shack were planning on heading down to Cummins on Melbourne Cup day for a class and a sell of wares.

So far there is only one person registered to do the class which is fine but they may decide not to come if there is no more interest.

This is not a push but to help them plan their week and work out if they cancel the trip or not.

The class ...

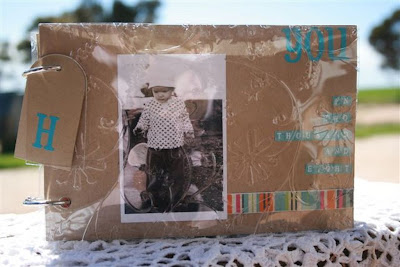
You In 2008
Transparency Booklet Class
By Meredith Treloar

Cummins Institute Supper Room
4th November, 2008
10:30am - 3:00pm

Meredith will be teaching us how to create this amazing booklet utilizing transparency, overlay's, Kraft paper, felt, brads, buttons, lace cardstock, alpha stickers along with a hint of patterned paper. We will be utilising the Cuttlebug for embossing & die cuts.

Cost: $45.00
Including Kit and Class

The kit includes:
2 x Jump Rings
1 x Heavy Transparency Overlay
1 x Patterned Paper
1 x Black Bling
1 x Kraft Cardstock
1/2 Bazzill Cardstock
1 x Carolee Creations Cardstock Alphas
1 pkt Scenic Route Alpha Stickers
2 x Heidi Swapp Glossy Hearts
1 x Sheet HSP Mini Graph Overlay
1/2 Sheet Lace Cardstock
Felt

Remember to bring along something to nibble and a drink or two to celebrate the Melbourne Cup.

If you can't make the class please do not hesitate to drop in for a browse of our extensive range of scrapbooking supplies, a chat and a drink.

Bring along your most elegant hat (or may be not so elegant) and win a prize.

We look forward to catching up with you on Tuesday, 4th November.

Until then
Happy Scrapp'n
From the Girls @ the Shabby Chic Shack.
Contact Brigette on 0427873006 for futher details.

Monday, October 27, 2008

Karen's tiny orbs.......


hmmmm well you know what i mean LOL. :-)


I just love love love all the colours in this one Karen. Love how the white make the colours pop so

much. Your pen dots look fantastic at angles to the photo...like a little shadow or two back there! The ribbon looks made for this page!

And damn you using that vine rub-on again!!!!!!!!! Love it!

Maryanne's matchbox trick


No not some nifty 'turn the match around in her mouth' type matchbox trick.........but a little toy car!


Who would have thought to get some funky tyre marks you just wizz a little car in some ink and do some burn-outs on your page!!??


Throw in some cool dots around the photos and VOILA! One awesome boy page. Those white pen dots really set the photos off!
Great job Maryanne..............

Sunday, October 26, 2008

Marika's even more dotty now!


And another page from Marika. Hmmmmm i am thinking she is quite mad for this dot challenge! YAY!


She says -
my real submission for the challenge. I photographed my page and realised that
the black dots dont stand out so I went over them in white pen and it looks
heaps better.


She showed me both and i agree the white spots look fantastic. Love how they define the star outline! And what a cute little subject for your photo. Just like a mini-Simon.

my spotty story......


Ok i did some pen dots on this page....a border of dots!

This is another scraplift (i am really enjoying not thinking while scrapping and not overanalysing every move i make)


Stephanie Howell's page in the August edition of Scrapbook trends is where my inspiration came from. Love how she filled the page but managed to maintain the white space.


I took photos of this page as i couldn't scan it without losing the dots! (since that is why we are all here it seemed a bit strange to scan and show it without any LOL)

Jenny's baaaaccccckkkkk


Hiya Jenny. great to see you back on the blog.
Sorry for delaying in getting it up. Have been out since yesterday.
little birthday suits are so gorgeous in all their glory arent they.

Saturday, October 25, 2008

Sandra's seeing spots


Sandra has done some pen dots around the corners of her photos, jounalling block and on some of the rub-ons!
She also says that she "scraplifted the layout from the pagemaps site...August pagemap.. layout by Cathleen La Hay."
Love the little hints of brown and teal colour. Brilliant!
oooooh do i also notice a pen drawn border around the outer edge? It took me years to work up enough nerve to do that so well done Sandra - it looks brilliant (and i am a bit of a doodle-phobe too though -----------> doodle as in freehand drawing not the other sort LOL)

Marika's gone dotty.....


love the colour in this one Marika! The bright dots against the white are so striking! We can forgive you for using paint or ink and not pen dots since it is so gorgeous!

I love how you are totally grasping the whole 'less is more' and your page looks so clean and yet so perfect. Well done!

Friday, October 24, 2008

Christmas stockings ... yes it is only 2 months away!!

Here is an email that I have just received ... some of you might be interested ... contact Ally Harris (details to be posted later!!).

Hi All
Cummins is having a Christmas stocking comp. It will be held 3rd 4th and 5th of Dec in The Cummins Hall
Finishing with a craft goods fair on the 5th.
Scrap n chat are hoping all scrappers out there will scrap a stocking for display for the comp and you will probably be able to sell them
More details later
On the 12th nov at scrap n chat I will have available mdf stockings available to scrap
I need you to let me know if your interested asap so I can cut out stockings in various sizes for you
There may a small fee to cover my time, recycled mdf with holes may be $2 a stocking but this shouldn’t matter as you will cover with paper, new mdf may be more like $5
Please let me know as soon as you can so I can start cutting away.

pajama party.

In case u haven't heard, Shabby Chic Shack are having a scrap a thon this Saturday night at the Lock Footy Clubrooms.

Scrap away the night, go for a dawn buster (I am), bring all your stash, pjs and a swag or go home when u are ready.

The girls are supplying pizza tea, the venue, goodies from the shop for retail therapy, and breakfast (toast and toppings). BYO drinkies and panadol

Email Tiff for Brigitte's S phone number to book yourself in.
I'm not sure of start time. When I find out I'll edit this post to add it in.

**edited to add 6pmish start**

Nearly my last outing before becoming a Harvest Widow, so I'm gonna make it a good one.